
Learn to Record: Recording Vocals & Instruments for Beginners
Your Creative Outlet
Music is a universal language that allows us to express our emotions and tell our stories. If you're an aspiring artist or a just a hobbyist looking to capture the magic of your music, recording is the gateway to your creativity. In this beginner's guide, we'll explore the fundamental steps to record your vocals and instruments, providing you with the foundation you need to bring your musical ideas to life.
What Will I Need?
Before you enter into the world of recording, you'll have to get some necessary home studio tools and equipment. Here's a checklist of what you'll need:
-
Song Ideas: Start with a clear vision or concept for your music. Whether it's lyrics, a melody, or a complete song, having a blueprint is important.
- Voice & Live Instruments: Will you be recording your voice or some live instruments like hand percussion, clarinet, sax, or acoustic guitar? Louder instruments like drums will need some extra isolation and you might want to go to a recording studio for that.
- Line-Level Instruments: Will you be recording synthesizers, drum machines, or DJ gear? These connect via the line-level inputs of the audio interface.
-
DAW (Digital Audio Workstation): Your DAW is your virtual recording studio. Software like Ableton Live, Pro Tools, or GarageBand allows you to record, edit, and mix your music.
-
Computer: A reliable computer with sufficient processing power and memory to run your chosen DAW smoothly.
-
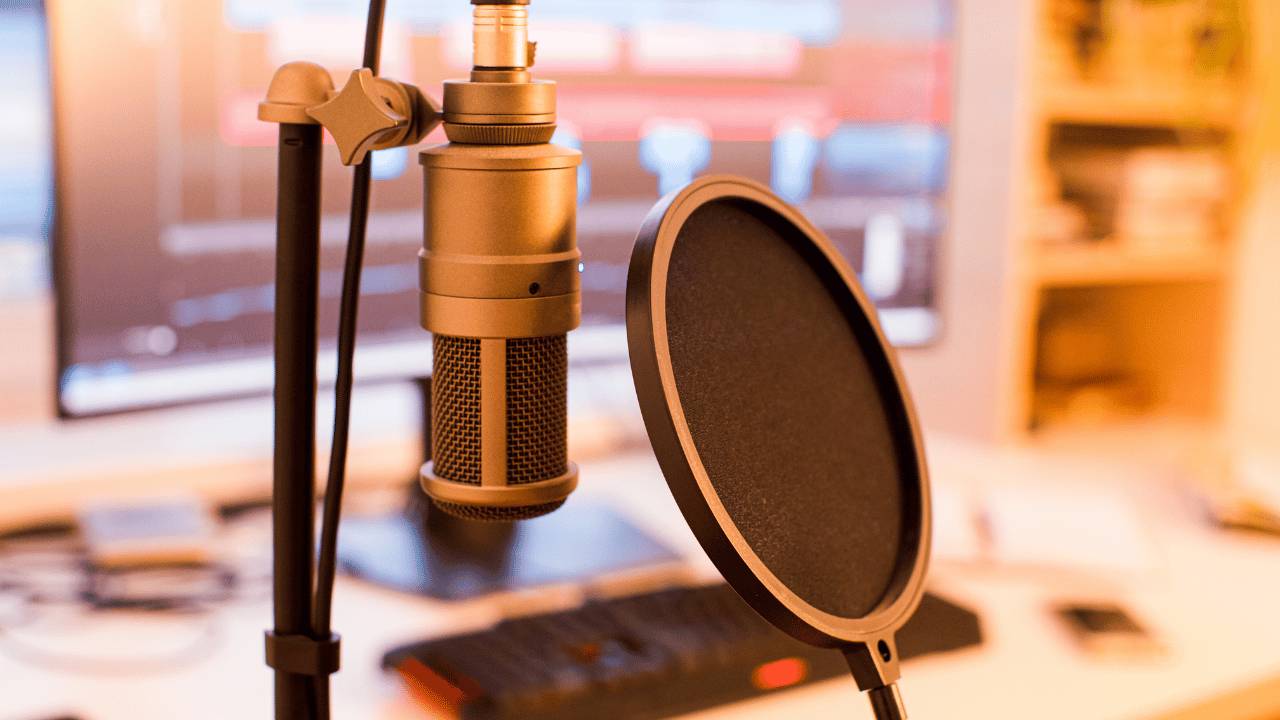
Microphone: Invest in a quality microphone suitable for your recording needs. Condenser or dynamic microphones are both great for voice and live instruments. Try a Shure SM-58 if you are "un-shure" 😃 or on a budget.
-
Cable: An XLR cable to connect your microphone to the audio interface.
-
Pop Filter: This accessory helps reduce plosive sounds (like 'p' and 'b' sounds) and captures a cleaner vocal recording.
-
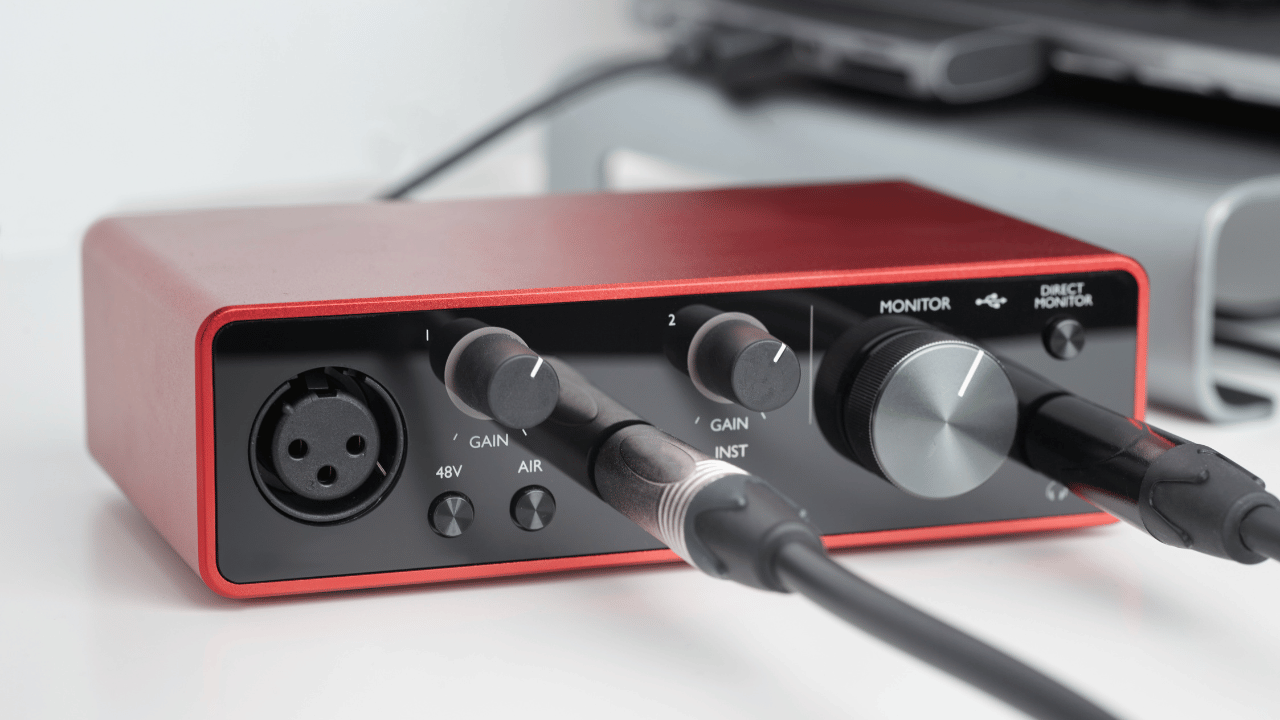
Audio Interface: This device converts analog audio signals from your microphone into digital data that your computer can process.
-
Headphones and/or Monitors: Good-quality headphones or studio monitors allow you to hear your recordings with accuracy, critical for the recording and mixing stages.
 ⭐️ Download my FREE Home Studio Setup Guide ⭐️
How to Set Everything Up
Setting up your recording space and equipment is the first step to achieving a clean and professional sound:
-
Connect Audio Interface to Computer: Plug your audio interface into your computer via USB or Thunderbolt and install any necessary drivers.
-
Headphones and Monitors: Connect your headphones or studio monitors to the audio interface's output.
-
Download and Install the DAW: Download your chosen DAW, follow the installation instructions, and configure it to work with your audio interface.
Creating a New Audio Track and Recording Your Microphone
Now that you have your gear set up, it's time to get your mic or instruments connected:
-
Cable and Pop Filter: Connect your microphone to the audio interface using an XLR cable, select the "Mic" input with the Mic/Line button, and attach the pop filter so it sits in front of the mic.
-
Phantom Power: If you're using a condenser microphone, ensure the phantom power on your audio interface is activated.
- Line-Level Instruments: Select the "Line in" with the Mic/Line button.
- New Track: Create a new audio track
-
Select Virtual Inputs and Outputs in the DAW: Configure your DAW to recognize your audio interface and the microphone you're using.
 Download my FREE Music Production Guides including The Magic Delay Settings
Checking the Audio Level
Proper microphone and line levels are essential for a clean and distortion-free recording:
- Record Enable: Press the red circle on your track to enable it for recording.
- Input Monitoring: Plug in your headphones and select "Input" for the track monitor mode.
- Green Lights Are Good, Red Lights Are Bad: Monitor your input levels in your DAW. Aim for levels that hit the green zone without entering the red, as this can cause distortion.
- Test Recording: Record a test to see if things sound good.
- Auto-Input Monitoring: Switch to "Auto-Input" monitoring so you can hear the playback of the recording from the hard drive.
Recording
With your setup ready, it's time to start recording some takes:
-
Name the Tracks: Give your track a descriptive name to keep your project organized.
-
Record Takes: Hit the record button, and let your creativity flow. You can record vocals or live instruments, capturing your musical ideas.
- Save: Save your session and back up your project and audio files to another hard drive (or two).
 ⭐️ Try my FREE Ableton Live course. Learn Ableton Live in 90-minutes for FREE ⭐️
Next Steps: Editing & Mixing
Once you've recorded your music and vocals, the journey has just begun. The next steps involve editing your recordings to correct mistakes and mixing your tracks to achieve a polished sound. Explore the vast world of audio effects, equalization, compression, and more to refine your music further.
Recording music and vocals is a rewarding journey filled with creativity and expression. With the right equipment and know-how, you can turn your musical ideas into reality and share your art with the world.
#learntorecord #recording #musicproduction #singer #singersongwriter #songwriter #musician #musicianproducer #singersongwriterproducer #recordingschool #recordingvocals #daw #homestudio
Also Read:
Transforming from a Songwriter to a Music Producer
Song Arrangement: The Instrumentation, Parts, Structure & Mix
Ableton Live for Singer-Songwriter-Producers: Self-Producing Your Song Ideas
![]()
Futch - Music Production Coach and Ableton Certified Trainer
Check out my live online music production program: Music Production Ninja...


