
Make Music Anywhere with Ableton Note the New iOS Beat Making App

Making music on the go has never been easier. Ableton's new iOS app, Note, makes it easy to create beats and melodies anywhere. You can then share your ideas or collaborate with anyone else who has either Ableton Note or Ableton Live. Note offers a variety of features that make it easy for anyone to create musical ideas, such as beat creation, melody creation, and song sketches. Ableton Note is available today in the Apple App Store.
This app is for producers, beatmakers, and songwriters. It has a built-in sequencer you can program by tapping your finger so you won't need a MIDI keyboard. You can explore sounds from the library of presets, or record your own sounds with your iOS mic. You can then edit and arrange and mix up to 8 musical clips on the 8 available tracks according to your needs. Compose a quick beat or sketch out a song idea in Note and you then have the option to send the compatible files to your computer to finish the song in Ableton Live.
This article explains the Ableton Note app, its features, and how it can be used to create beats and song ideas on your iPhone or iPad.
What is Ableton Note?
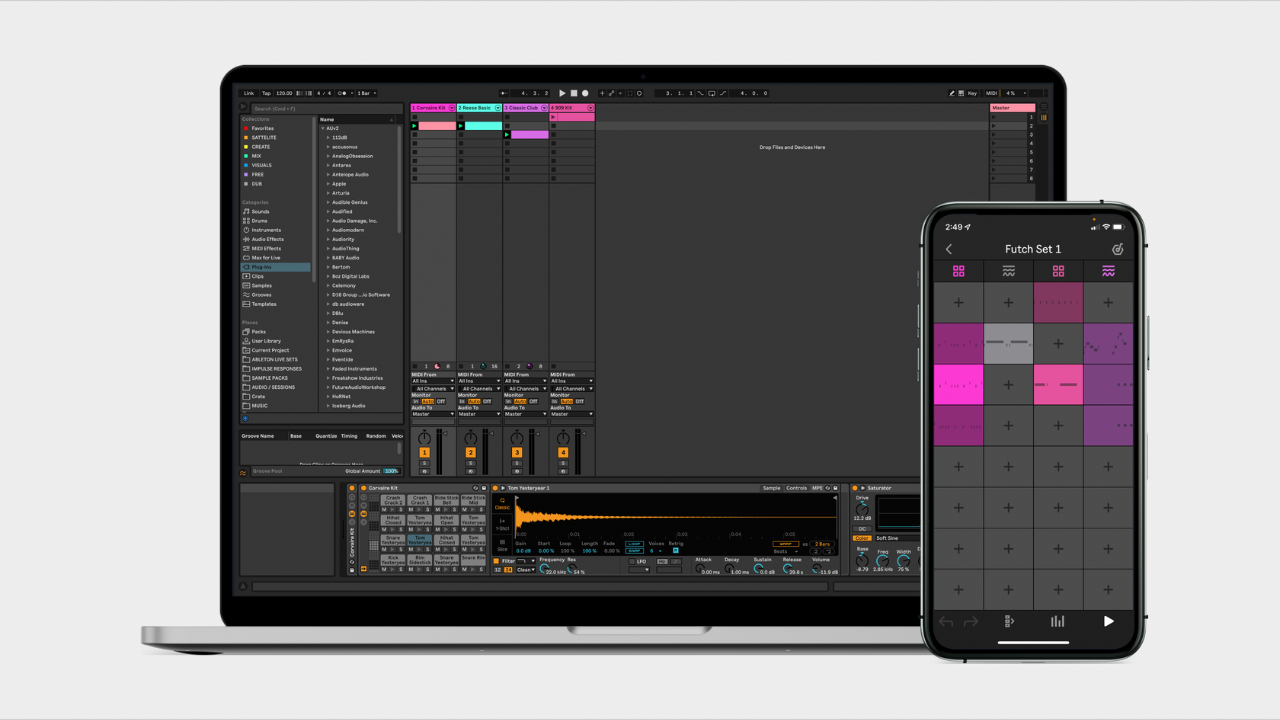
If you’ve ever used Ableton Live’s Session View, or its custom hardware MIDI controller Push before, you’ll instantly notice some similarities. Ableton Live, Push, and Note all use the same sets, views, clips, tracks, scenes, instruments, and sounds to create tempo-synced songs and beats.
Set: Just like in Ableton Live, each new song or beat idea you create in Note is called a set. Sets can be shared and opened by anyone with Ableton Note or Ableton Live. You can get a FREE 90-day Trial of Ableton Live Suite at Ableton.com.
Clip: A clip is a piece of music that is made up of individual notes or MIDI data. Clips loop endlessly on each instrument track just like in Ableton Live's Session View.
Tracks: Note allows you to create a maximum of 8 instrument tracks. Each track can hold one instrument sound and up to 8 performance clips.
Scenes: Clips located on the same horizontal row across all of the tracks are called scenes and they can all be triggered to play back at once by pressing scene number (1-8) on the left side of the Session View.
Session View: Clips are arranged in a matrix called the Session View - exactly like the one in Ableton Live. You can trigger a clip to play by tapping on it, and you can also edit or duplicate the clip. If you want to insert a duplicate clip into the open slot underneath the original, you can press and hold the clip.
Main Page: The main page of Note shows all of your Sets and their storage location (Ableton Cloud or Local). You can also duplicate, rename, or upload artwork for the Set, as well as delete, remove from the Cloud, or share the Set using the usual iOS share options: AirDrop, email, and other select apps.

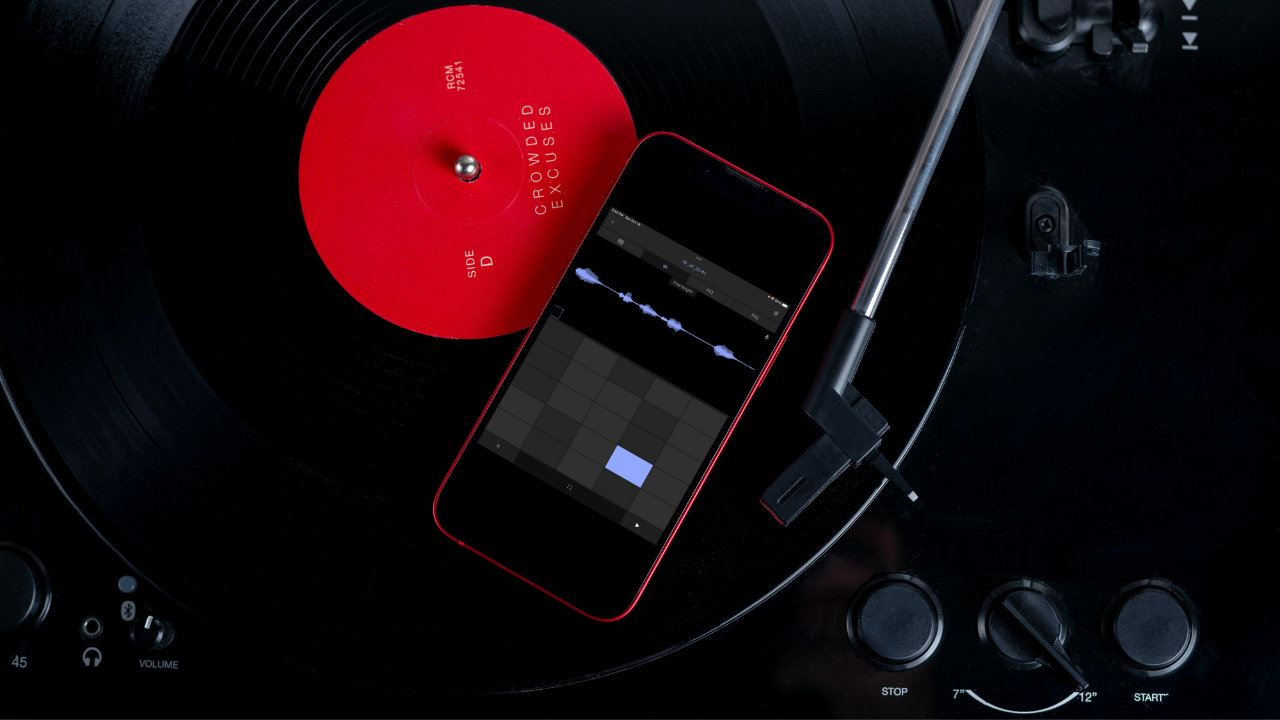
Ableton Note Session View
Clip Launching: Clip launching is when the performance aspect of Note begins. You can play back different clips from different tracks by pressing them before the loop cycle of the current clip ends. Only one clip from each track can play back at a time.
Performance: The bottom row of each Set’s Session View has four icons that select the following clip playback and performance options:
Undo/Redo: The left arrow icon allows you to make multiple undo actions, and the right arrow allows you to make multiple redo actions.
Scenes: The scenes icon on the bottom left lets you see and launch the vertical row of scenes (1-8) that plays back the whole row of clips in sync. This is a great way to start developing some song structure. Scenes 1-5 might represent the intro, verse, chorus, bridge and outro of the song.
Mixer: The mixer icon lets you control the volume levels for each track. You can also solo (S) a track, which isolates the sound of that track, or mute (M) multiple tracks.
Transport: The last bottom row icon features a simple transport that allows stopping or playback of the whole Set.

Ableton Note Instrument View
Instrument View is a view where you can select and adjust instrument sounds, play the pads, or capture a loop. You can also enter notes into the clip sequencer by either tapping on the pads, playing the keys, or repeating the notes. After the first notes are entered, the option to "Create Clip" will appear.
Pads: Pads are a traditional way to create beats using a sequencer. You can play the whole drum beat onto the pads all at once, or tap in each drum separately.
Keys: There is a piano keyboard that you can use to play the synthesized wavetable melodic instrument presets.
Repeat: Repeat allows you to enter a repeated sequence of notes at a note division of your choosing. This can be adjusted in by sliding your finger, allowing for interesting real-time polyrhythmic combinations.
Single: The Drum Rack has the option to use one single x/y pad for adjusting the note velocity of a single pad.
Octave: This is where you can select the octave for a melodic instrument. You can choose between -2 to +5 and it can be adjusted on the fly with your finger.
Recording Loops with Ableton Note
Create Clip: To create a clip, you will need to start by tapping on the 8x8 pad matrix. The prompt “Create Clip” will appear and you can tap it to save your loop.
Capture: You can save a performance loop by pressing the capture [ ] icon after you enter notes while the transport is stopped. This allows you to save ideas even if you weren't recording them.
Add: You can add more note data to a clip by pressing the “Add” prompt after an additional note performance. These notes will now be included in the previous performance on the clip.
Editing Clips with Ableton Note
After recording your performance into a clip it will start to loop endlessly and you can decide if it needs any further editing to make it sound perfect.
Edit Clip: The Edit Clip option is available when you tap and hold a clip in the Session View. You can also double-tap the clip to bring up the Instrument View editor.
Note Selection: You can tap or tap and drag in the clip area just above the 8 pads to select one or more of the notes in the clip.
Operations: The operations that are available for note editing include transposing notes up or down by a semitone or octave, nudging the note forward or backward by 1/64th note up to ¼ note including a triplet option.
Quantization: You can change the timing of a clip's notes to match the current tempo in blocks of 1/64th note up to ¼ note including a triplet option.
Velocity: You can adjust the velocity of each note to affect its volume. This will determine how loud each note sounds.

Ableton Note Instruments
All of the sounds in Ableton Note are made from short audio files called samples. They provide a wide range of sounds: acoustic and electronic drums, analog synth and bass, mallets, guitars, brass, pianos, and sound effects.
Presets: Each sound in the library is available as a one-shot sample preset. You can also swap out any sound at any time with another one. The recorded performance information is digital and is not attached to the sound. The Note presets correspond to the same presets found in Ableton Live, so you can easily transition between the two apps.
Drum Rack: Drum racks are used to create drum beats. Each drum has its own pad, and you can program a complete drum beat on a single track. Drums are spread out over 16 pads, and the kick drum is usually on the bottom right pad. The snare and hi-hat are located on the 2 pads directly above it.
Synth: Ableton's Wavetable synth is used to create all of the melodic sounds. Wavetable synthesis is a similar concept to a sampler where a modulating and evolving collection of samples is used to emulate a traditional synthesizer or instrument.
Sampler: Ableton’s Sampler instrument is similar to a drum rack, but it can play back a single one-shot sample or loop. You can filter, de-tune, and manipulate the sample sounds in the Sampler. You can also record your own voice or sample sounds directly into the Sampler with the microphone on your iOS device.
Resampling: To sample a sound, open the Sampler instrument view, and tap the record (circle) icon. You can also use the microphone icon to record sound through your iOS mic. To change between sampling modes, hold the icon down.
Track Types: The icon above each track indicates the track instrument type: Drum rack, Synth, or Sampler. You can move, duplicate, or delete tracks by clicking and holding the icon, and then selecting one of the options from the drop-down menu. If you want to add a new track, hit the plus sign in the right corner.
Ableton Note Sound Design
Clicking the track instrument icon in the Set’s main View will reveal 3 to 4 tabs on the top row depending on the instrument type. The last two tabs contain audio effects.
Drum Rack: The sound design parameters include controls for filter frequency and resonance, transpose, detune and envelope ADSR (attack, decay, sustain, and release) Settings. The 2nd tab allows you to switch the sound of a pad for any other sound in the library. The first effect is for the individual drum pad only while the 2nd effect is applied across the whole kit.
Wavetable: The sound design parameters include controls for filter cutoff, FM (frequency modulation), warp, wave position, and envelope ADSR. Two separate effects can be applied to any wavetable instrument track.
Sampler: The sound design parameters include controls for filter frequency and resonance, note transpose and detune, envelope ADS (attack, decay, and sustain), plus an LFO (low frequency oscillator). Two separate effects can be applied to any sampler instrument track.
Effects: The effects include EQ, Chorus-Ensemble, Delay, Phaser-Flanger, Redux, Reverb and Saturator and are applied in series or parallel depending on the effect. Just like instrument settings, any effect settings will be recalled perfectly if the Note set is later opened in Ableton Live.
Ableton Note Settings
Clicking the Settings logo in the top right of the Set gives you 4 options: Metronome, Tempo, Key & Scale, or Export Audio.
Metronome: A metronome beep provides a continuous tempo pulse to keep you in time as you record your parts. It has an emphasis on the first beat of every bar and can be turned ON or OFF.
Tempo: Clicking the Tempo lets you use a slider or arrows to adjust the current tempo or tap the desired tempo in with your finger.
Key & Scale: Turning Key & Scale ON allows you to keep the notes locked into whichever Key and scale you wish to use. For example, you could choose the key of “C” and the Major scale. You will see a preview of the notes available for the current selection.
Export Audio: This is to export a stereo bounce of your song idea. The 2 file types options are wav or m4a. After the export, you can send the file via iOS sharing options.

Collaborating with Ableton Note
There are a few exporting and sharing options available for sending your Note Set to a friend or producer. To open the set they will need Ableton Note or Ableton Live.
Ableton Cloud: The brand new Ableton Cloud will let you save up to 5 Ableton Note Sets so you can open them in Ableton Live or on another device with the Note app.
Ableton Live: After transferring a Note set to a computer it will automatically open up using either Ableton Live Suite or the 90-day free trial.
Ableton Link: Ableton’s local network sync tool allows multiple users to wirelessly connect Link-enabled music-making apps like Reason, Serato DJ, Maschine, and Traktor Pro so you can jam together in perfect sync.
The Future of Mobile Beatmaking
With the release of the new Note app, Ableton is positioning itself to revolutionize the way producers and songwriters make music on their smartphones. This is a huge step in the direction of mobile beat-making, and it’s just the beginning. With this app, Ableton is paving the way for a whole new generation of producers to get creative with their mobile devices. Ableton’s new creation will have massive potential for musicians looking to stay ahead in the digital age. It’s easy to see that this could be a game-changing device for both professional and amateur musicians alike!
![]()
Futch - Music Production Coach, Ableton Certified Trainer
#ableton #note #live #beatmaker #songwriter #producer

24 week live online classes and on-demand video training:
• Music Production Fundamentals • Writing Exciting Songs • Designing Your Artistic Vision


